Are you new to the world of makeup and want to learn how to use concealer? Look no further! In this article, we’ll guide you through the process of applying concealer like a pro. Discover the purpose of concealer, find the perfect shade for your skin tone, and learn how to prep your skin for flawless application. Say goodbye to dark circles and blemishes as we teach you expert blending techniques for a seamless finish. Let’s get started!
Understanding the Purpose of Concealer
To grasp the true essence of concealer, you must understand its fundamental purpose. Concealer is a makeup product designed to conceal imperfections and even out skin tone. It is typically used to cover dark circles, blemishes, redness, and other discolorations on the face. Understanding the different types of concealer formulas is crucial in achieving a natural looking finish.
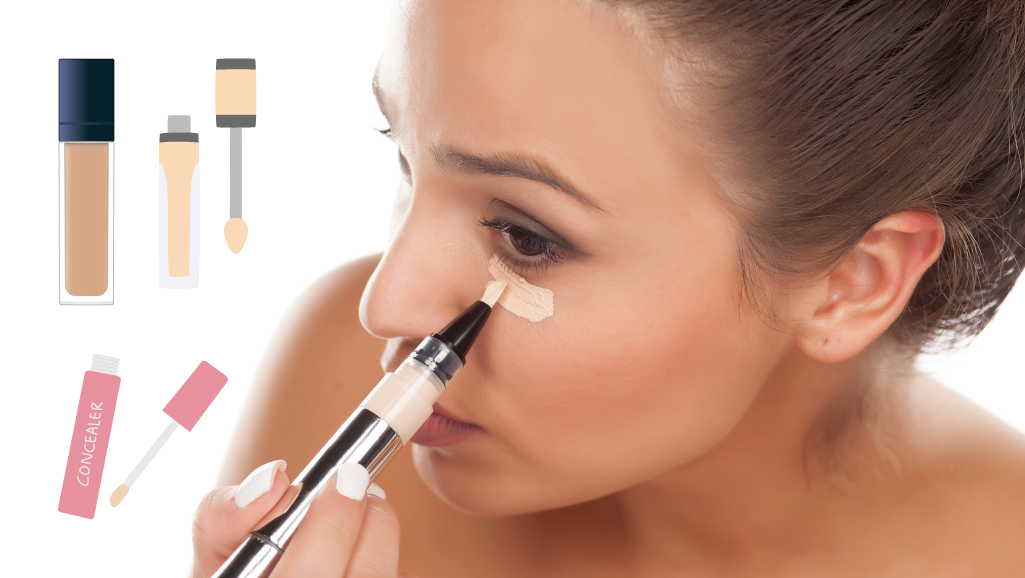
There are three main types of concealer formulas: liquid, cream, and stick. Liquid concealers are lightweight and offer buildable coverage. They work well for under-eye circles and can be easily blended into the skin. Cream concealers are thicker and provide heavier coverage. They are ideal for covering acne scars and hyperpigmentation. Stick concealers have a solid consistency and offer full coverage. They are great for spot concealing and covering larger areas of discoloration.
To achieve a natural looking finish with concealer, there are a few tips you should keep in mind. First, choose a shade that matches your skin tone or is slightly lighter for under-eye brightening. Apply the concealer sparingly and blend it well into the skin using a brush or your fingertips. Set the concealer with a translucent powder to prevent creasing and prolong its wear time.
Choosing the Right Shade for Your Skin Tone
Now that you understand the purpose of concealer and the different types of formulas available, it’s important to choose the right shade for your skin tone. Finding the perfect match for your complexion can make all the difference in achieving a flawless finish. Here are four key points to consider when choosing the right shade:
- Understanding your undertones: Undertones are the subtle hues that lie beneath the surface of your skin. They can be categorized as warm, cool, or neutral. Determining your undertone is crucial in selecting a concealer shade that complements your natural complexion.
- Undertone matching: Once you have identified your undertone, you can begin matching it with the appropriate concealer shade. For warm undertones, opt for shades with peach or golden undertones. Cool undertones are complemented by shades with pink or blue undertones. Neutral undertones can be paired with shades that have a balance of warm and cool undertones.
- Color correction techniques: In addition to finding the right shade, color correction techniques can help address specific skin concerns. For instance, green-toned concealers can neutralize redness, while peach or orange-toned concealers can disguise dark circles.
- Color correcting for different skin concerns: Different skin concerns require specific color correction. Purple-toned concealers can counteract sallowness or dullness, while yellow-toned concealers can brighten dark spots or discoloration.
Prepping Your Skin for Concealer Application
Before applying concealer, it is important to properly prep your skin. Start by cleansing your face to remove any dirt, oil, or makeup residue. Follow up with a moisturizer to hydrate and plump the skin, creating a smooth canvas for concealer application. Additionally, using a primer can help fill in fine lines and pores, ensuring a flawless and long-lasting finish.
Cleansing and Moisturizing
Start by washing your face and applying moisturizer to create a clean and hydrated canvas for your concealer. This step is crucial in prepping your skin for flawless concealer application. Follow these expert tips to ensure you’re getting the most out of your cleansing routine and choosing the right moisturizer:
- Cleanse your face thoroughly: Use a gentle cleanser suitable for your skin type. Massage it into your skin in circular motions to remove dirt, oil, and makeup residue.
- Exfoliate regularly: Incorporate a gentle exfoliator into your skincare routine to remove dead skin cells and reveal a smooth complexion.
- Hydrate with a moisturizer: Choose a moisturizer that suits your skin type, whether it’s dry, oily, or combination. Apply it evenly all over your face, focusing on any dry areas.
- Allow time for absorption: Give your moisturizer a few minutes to absorb into your skin before moving on to concealer application. This will ensure that your skin is adequately hydrated and ready for makeup.
Primer for Smooth Application
After cleansing and moisturizing your skin, the next step in prepping for flawless concealer application is using a primer for smooth application. Primer is a crucial step in your makeup routine as it helps create a smooth canvas for your concealer and enhances its longevity. The benefits of using a primer include filling in fine lines and pores, controlling oiliness, and providing a base for even application. To apply primer, start by squeezing a small amount onto your fingertips or a makeup brush. Gently pat and blend the primer onto your face, focusing on areas where you will be applying concealer. Allow the primer to dry for a few seconds before proceeding with your concealer application. Remember to choose a primer that suits your skin type and concerns to achieve the best results.
Applying Concealer to Cover Dark Circles
To effectively cover dark circles with concealer, you’ll need to start by applying a color corrector. Green correctors work best for red or purple-toned dark circles, while peach or orange correctors are ideal for blue or brown-toned dark circles. After applying the corrector, use a small brush or your fingertips to blend the concealer into the skin, ensuring seamless coverage. Finally, set the concealer with a translucent powder to make it last longer throughout the day.
Color Corrector Application
To effectively cover dark circles with concealer, begin by selecting the appropriate color corrector for your skin tone. Here are four color correcting tips to help you achieve a flawless finish:
- Identify your undertone: Determine if you have warm, cool, or neutral undertones. This will guide you in choosing the correct color corrector shade.
- Choose the right color corrector: For dark circles, opt for a peach or orange color corrector. These shades help neutralize the bluish or purple tones under the eyes.
- Apply with precision: Use a small brush or your fingertip to apply the color corrector directly onto the dark circles. Gently pat and blend the product until it seamlessly blends with your skin.
- Layer with concealer: After applying the color corrector, follow up with a concealer that matches your skin tone. Apply it in a triangular shape under the eyes and blend it out for a seamless finish.
Blending Techniques for Coverage
To achieve a seamless finish when applying concealer to cover dark circles, start by blending the product using small, gentle strokes. Blending techniques are crucial for achieving natural-looking coverage and ensuring that the concealer seamlessly blends into your skin. Here are some coverage techniques to help you achieve the best results:
| Technique | Description |
|---|---|
| Patting | Gently tap the concealer onto the dark circles using your fingertips or a brush. This technique helps the product to adhere to the skin and provides a fuller coverage. |
| Feathering | Lightly swipe the concealer in an outward motion, starting from the inner corners of your eyes. This technique helps to blend the concealer smoothly and prevent any harsh lines. |
| Stippling | Dab the concealer onto the dark circles using a stippling brush or a sponge in a stippling motion. This technique helps to evenly distribute the product for a natural finish. |
Setting Concealer for Longevity
To ensure long-lasting coverage for your dark circles, it is important to set your concealer. Setting your concealer helps to lock it in place, preventing creasing and ensuring that your makeup stays put all day long. Here are four steps to help you set your concealer for a flawless and long-lasting finish:
- Choose a setting powder that matches your skin tone. Using a fluffy brush, gently tap the powder onto the areas where you applied concealer. This will help to set the product and prevent it from moving throughout the day.
- Use a damp beauty sponge to press the powder into your skin. This will help to blend the concealer with the rest of your makeup and create a seamless finish.
- Apply a thin layer of translucent powder over the concealer. This will further set the product and prevent any creasing or fading.
- Finally, mist a setting spray over your face to lock everything in place. This will help to ensure that your concealer stays put and your makeup lasts all day.
Concealing Blemishes and Acne Scars
Cover up blemishes and acne scars by applying concealer with a tapping motion for maximum coverage. When it comes to concealing blemishes and acne scars, it’s important to choose a concealer that matches your skin tone and has a high coverage formula. Start by prepping your skin with a primer to create a smooth canvas. Then, take a small amount of concealer on your fingertip or a small brush and gently tap it onto the blemish or scar. Avoid rubbing or dragging the product, as this can make it look patchy and uneven.
To minimize the appearance of redness, opt for a green-tinted concealer. Green cancels out redness, so apply a small amount of green concealer on any red or inflamed areas before applying your regular concealer. This will help neutralize the redness and create a more even complexion.
When it comes to concealing hyperpigmentation, choose a concealer that is one to two shades lighter than your skin tone. Apply a small amount of concealer directly onto the hyperpigmented area and blend it out with a brush or your fingertips. Make sure to blend the edges well to create a seamless finish.
Finish off by setting your concealer with a thin layer of translucent powder to ensure it stays in place throughout the day. This will also help prevent creasing and keep your blemishes and acne scars concealed for longer. Remember, practice makes perfect, so keep experimenting with different techniques and products to find what works best for you.
Blending Techniques for a Seamless Finish
Blend the concealer seamlessly into your skin for a flawless finish. To achieve a perfectly blended look, follow these expert techniques:
- Prep your skin: Before applying concealer, make sure your skin is clean and moisturized. This will create a smooth canvas and help the concealer blend seamlessly.
- Use the right tools: Invest in a good quality concealer brush or sponge. These tools are designed to blend the product evenly and create a natural finish. Avoid using your fingers, as they can transfer oils and bacteria onto your skin.
- Apply in thin layers: Instead of applying a thick layer of concealer all at once, start with a small amount and build it up gradually. This will prevent the product from settling into fine lines and creases.
- Highlighting techniques: To further enhance your complexion, try highlighting certain areas of your face. Apply a lighter shade of concealer to the center of your forehead, bridge of the nose, under the eyes, and on the cupid’s bow. Blend these areas carefully to create a subtle, luminous effect.
Setting and Finishing Your Concealer Look
Once you have blended your concealer seamlessly into your skin, it’s time to set and finish your concealer look. Setting your concealer is essential to ensure it stays in place all day and doesn’t crease or smudge. One of the most effective setting techniques is to use a translucent powder. This will lock in the concealer and create a smooth, matte finish. Take a small fluffy brush and gently tap it into the powder, then lightly dust it over the concealed areas. Be sure to focus on the areas where you tend to get oily, such as the T-zone.
After setting your concealer, it’s time to add the finishing touches to complete your look. One important step is to blend the edges of the concealed areas with the rest of your foundation. This will create a seamless transition and ensure that your concealer looks natural. You can use a beauty sponge or a clean fingertip to gently blend the edges.
To further enhance your concealer look, you can apply a touch of highlighter on the high points of your face, such as the cheekbones, brow bone, and down the bridge of your nose. This will add a subtle glow and draw attention to those areas. Finally, don’t forget to set your entire face with a setting spray to lock in your makeup and make it last even longer.